Edit Recurring Appointments
Users with access to the ![]() Appointments book can update the patient's appointment details.
Appointments book can update the patient's appointment details.
Before you begin
Permissions:
You must first create a recurring appointment for the patient. - View Appointments
- View All Appointment Books
- Edit Appointments
- Create Appointments
- Delete Appointments
About this task
Procedure
To edit recurring appointments:
-
In the
 Appointments book, select the appointment you want to update.
-
Click
 Edit.
Tip:Alternatively, use the drag handle to reschedule the appointment to a new time. For more information, see Reschedule an Appointment Time or Date.
Edit.
Tip:Alternatively, use the drag handle to reschedule the appointment to a new time. For more information, see Reschedule an Appointment Time or Date. -
Edit the appointment details you can edit:
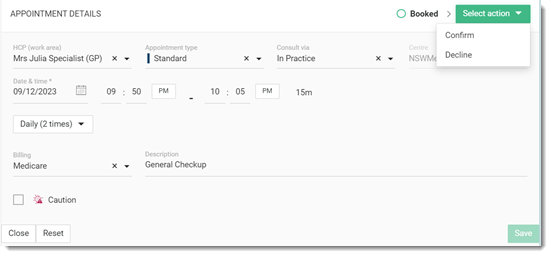
In the Appointment details section:- The current status of appointment is displayed in the heading on the
right. To view details of the appointment, click
 Booked.
 - To confirm an appointment, select :
- After the changes are saved, the appointment's status changes to Confirmed.
- To view the status details, click Confirmed.
- In the Appointments book, the appointment status is shown
as Confirmed.
- To decline an appointment, select . After you have declined an appointment:
- In the Appointments book, the appointment is greyed
out.
- The appointment status is shown as
 Declined.
- In the
- If required, from the Description list, select a previous description.
Note:For confirm, decline, and did not attend appointment statuses, you can set the status individually for each appointment, but not for an entire series. - The current status of appointment is displayed in the heading on the
right. To view details of the appointment, click
-
To update the recurrence details:
-
From the current recurrence list, select the
required interval.
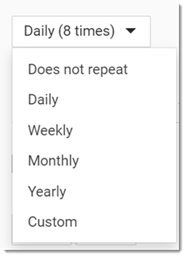
Tip:To cancel the recurrence, select Does not repeat. For more information, see Cancel Recurring Appointments.
-
From the current recurrence list, select the
required interval.
-
If you want to edit a
future appointment or appointments in a series, click
 Future Appointments and select the appointment you want to edit, or the
appointment from which you want to make changes.
Future Appointments and select the appointment you want to edit, or the
appointment from which you want to make changes.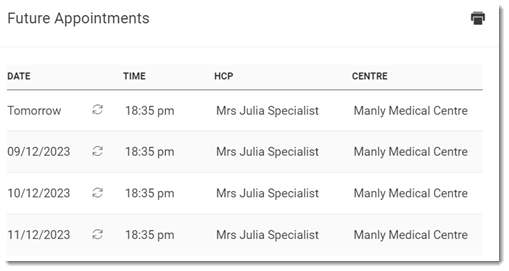
-
After you have saved the appointment details, in the Edit recurring
event panel, select:
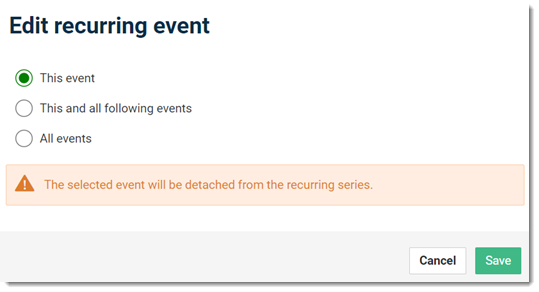
- This event - only the selected event is updated. The updated event is detached from the series.
- This and all following events - update the event you select and all events in the series that follow that event. A new series is created for these events. You lose any customisations to the events in the series and past events remain unchanged.
- All events - update all future events in the series from now. A new series is created for these events. You lose any customisations to the events in the series and past events remain unchanged.