Refer a Patient to a Specialist
Create a referral letter and send it to a specialist securely from the Letter Writer section.
Before you begin
About this task
Letters emailed to other health providers are not password-protected. To email a registered health provider securely, select Secure Message Delivery (SMD) to send the letter via HealthLink directory.
Procedure
To create and send a patient referral to a specialist:
-
In a patient's Consult panel, click
 Letter Writer.
Tip:If you cannot see the Letter Writer, click
Letter Writer.
Tip:If you cannot see the Letter Writer, click More and select the Letter Writer section.
 -
From the
 Search list, enter and search the Specialist
Referral letter template. For more information, refer to Write a Letter.
Tip:Alternatively, if you have already added the Specialist Referral letter template to your favourites, from the Favourites list, select it. For more information about adding to favourites, see Template Favourites.
Search list, enter and search the Specialist
Referral letter template. For more information, refer to Write a Letter.
Tip:Alternatively, if you have already added the Specialist Referral letter template to your favourites, from the Favourites list, select it. For more information about adding to favourites, see Template Favourites. -
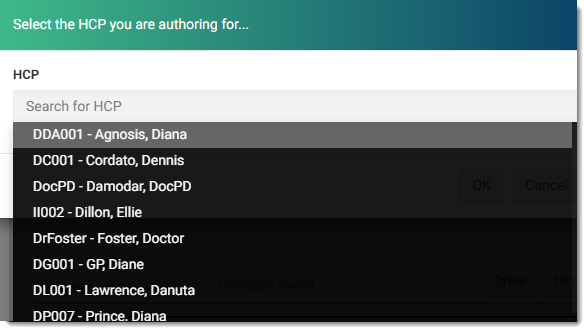
In the Select the HCP you are authoring for... window,
search and select a HCP from the drop-down list click
OK.
-
In the Presenting Problem field, enter the patient's
presenting problem details.
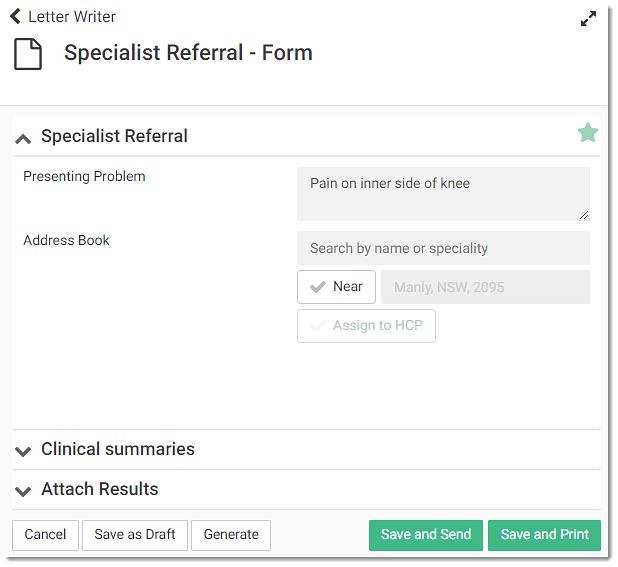
-
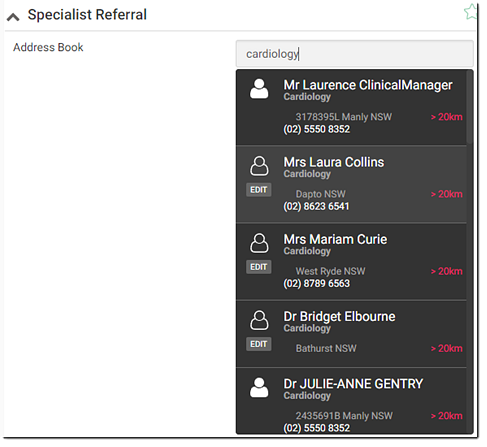
If required, in the Address Book field, add a
specialist's details:
- Search - search by specialist's name, organisation's name or speciality and select the addressee from the list.
- Near - to search for a specialist type by proximity:
- Set Near.
- Enter a suburb.
- Search for a
specialty.
Select from the specialists listed by proximity.
- Assign to HCP - to assign an HCP for the patient, set Assign to HCP.
-
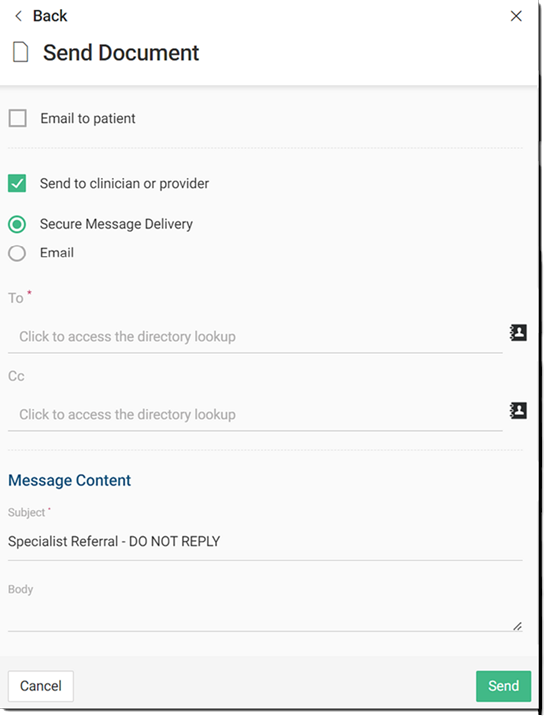
To send a referral letter to the clinician or provider, in the Send
Document panel, select Send to clinician or
provider.
-
Select the required send options:
- Secure Message Delivery - send only to
recipients who are recorded in the HealthLink Directory. This option is
selected by default. To add a recipient:
- In the To field, click
 Directory lookup.
 - In the Directory lookup window, search by
the HCP's given name, specialty, location, organisation name or
service type.
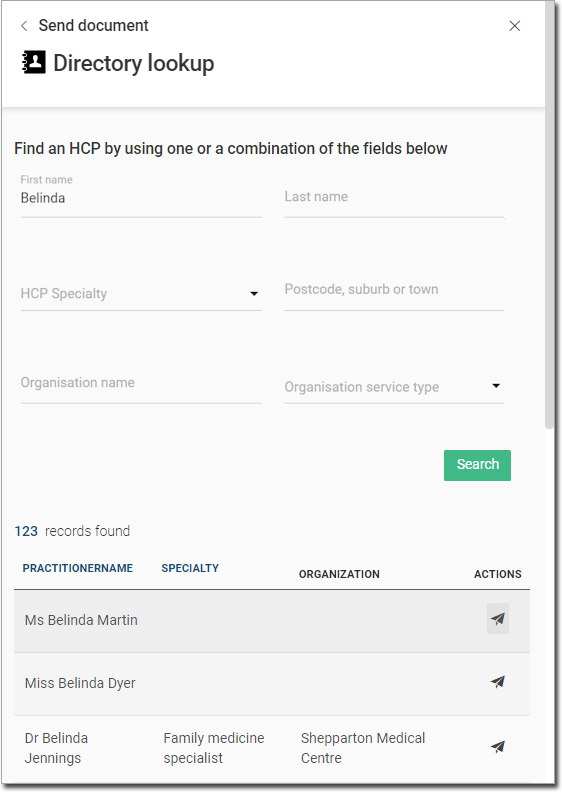
- From the Records found list, select the
required recipient or hover your mouse over the required
recipient in the Actions column and click
 Select.The selected recipient is automatically added to the To field.Note:If a potential recipient is not a HealthLink participant, an
 Information icon is displayed in the
Actions column and you cannot
select them.
Information icon is displayed in the
Actions column and you cannot
select them. - To send the referral letter to multiple recipients, repeat the steps a to c for each additional recipient.
- To add additional addressees, in the CC
field, click Directory lookup and repeat the steps b to c if
required.
- In the To field, click
- If emailing the letter, set Email and
in the To field start typing the recipient and select them
from the list.
If a recipient's details are not recorded in the address book, to add a new recipient, click
 Add new address. For more information, see Add New Addresses.Note:Email is not secure and documents sent via email to HCPs are not password protected.
- Secure Message Delivery - send only to
recipients who are recorded in the HealthLink Directory. This option is
selected by default. To add a recipient:
Results
If successful, a message Request sent to SMD successfully pops up near the E-mail address area at the top.
A specialist referral letter with its status is added to the Actions section at the bottom of the
Consult panel.

What to do next
In the Actions section, if required:
- To print a copy of the document, click
 Print.
 - To reprint the document, hover your mouse over the printed document and
click
 Reprint.Note:Once printed, the icon changes to .
 - To delete the document, hover your mouse over the required document and
click
 Delete.
 - To modify and send the referral again, click to open the Send Document window.
When the consultation is complete:
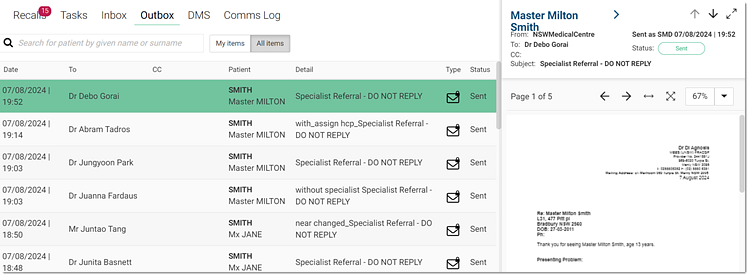
- To view the sent documents, in the
 Patient Timeline panel, select
  Specialist from the
Show: list, then select one referral letter from
the specialist referral list. The selected document is displayed in the
Preview window. For more information about
controlling the documents, see Document Controls.
Specialist from the
Show: list, then select one referral letter from
the specialist referral list. The selected document is displayed in the
Preview window. For more information about
controlling the documents, see Document Controls.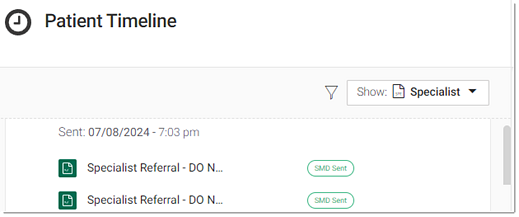
- The document is also displayed in section. For more information, see SMD Outbox.