Generate Financial Reports
Generate various types of financial reports from the Financial Reports tab.
Before you begin
Procedure
To generate reports:
-
From the main menu, select
 .
.
-
In the Financial Reports window, from the Reports
Name list, select the report you want to generate.
The list of available reports varies depending on the permissions assigned to the user. For more information, see Financial Reports.
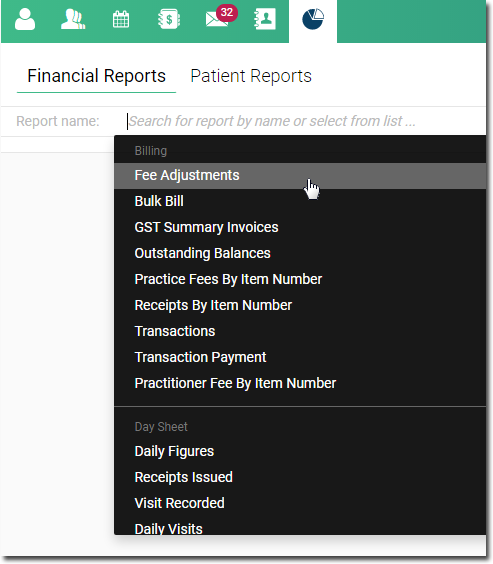 Tip:To view the purpose of the report, click the Description header.
 -
In the Report Parameters section, select the required details to
generate the report:
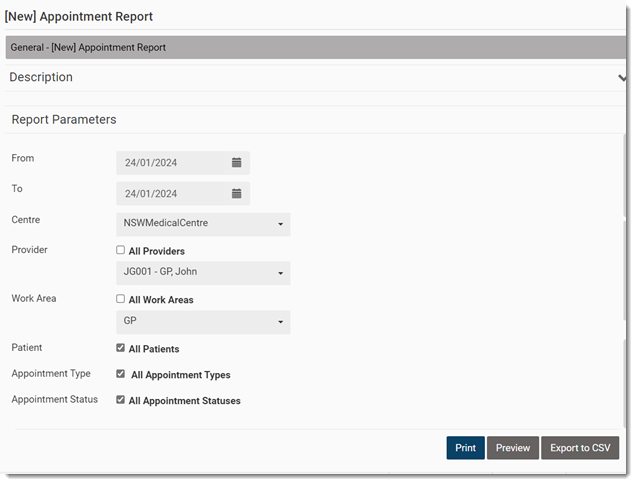
- If applicable, select the date or date range from the applicable calendars below:
- Day Sheet Date
- Active as of
- From and To
- If applicable, from the Time Period list, select the required calendar year (1 November - 31 October).
- If applicable, for more than one centre, from the Centre list, select the centres you want to report on. Otherwise this field displays your current centre.
- If applicable, to display all providers in the report, set All
Providers. Alternatively, select the required provider from the
applicable fields below:
- Provider
- Vaccinator
- Invoicing Provider
- If applicable, to display all patients in the report, set All
Patients. Alternatively, select the required patient from the applicable
fields below:
- Patient
- Patient Name
- If applicable, to display a report of all scripts under that number, in the Script Number field, enter the script number.
- If applicable, to display all types in the report, set all types. Alternatively,
select the required type from the applicable fields below:
- Adjustment Type
- Appointment Type
- Visit Type
- If applicable, to display all statuses in the report, set all statuses.
Alternatively, select the required status from the applicable fields below:
- Appointment Status
- Batch Status
- Invoice Status
- Queue Status
- Visit Status
- If applicable, to display all work areas in the report, set Work Area. Alternatively, from the Work Area list, select the specific work area you want.
- If applicable, from the Immunisations list, select the required immunisation.
- If applicable, in the Outstanding Balance field, enter the outstanding balance amount.
- If applicable, in the Grouping options field, set the
required group:
- Group By Visit Type
- Group By Work Area
- Set the required fields if applicable:
- Show GST Summary
- Summary Only
- Group By Payment Type
- Include adjustments
- If applicable, select the date or date range from the applicable calendars below:
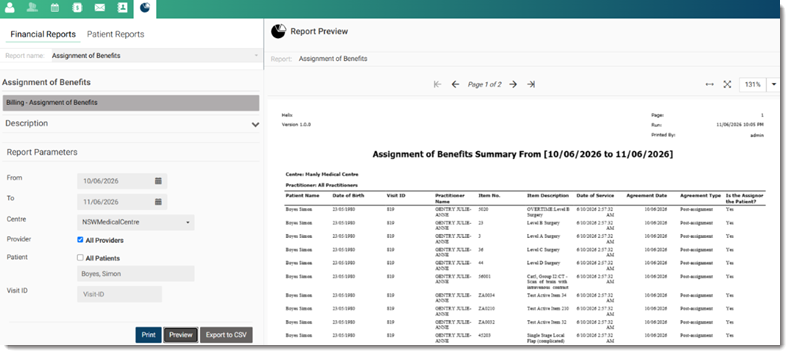
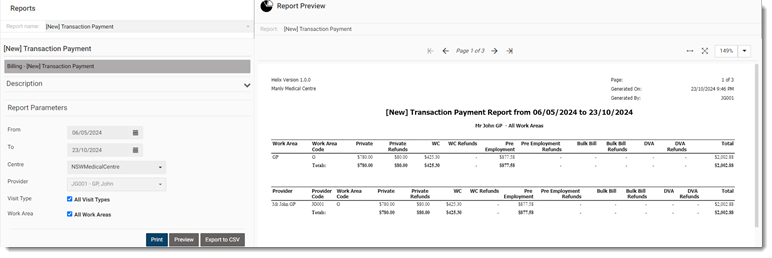
Results
The preview report is displayed in a panel for the report area that you want to generate.
Note:
Filtering on the Assignment of Benefits
report is currently not supported and the report includes all billings. Since Assignment of
Benefit (AoB) information is captured only for Medicare bulk bills, related fields will be
blank for non-Medicare visits. To view only billings with AoB details, download the report
as a CSV file and apply filters within the exported file.