Create a Visit
A visit is automatically created when an appointment is added for a patient. For walk-in patients, create a visit manually.
Before you begin
About this task
Procedure
-
From the
 Patient Search, enter and select a patient.
-
In the floating navigation bar, click
 Visit.
-
In the Create Visit panel, set:
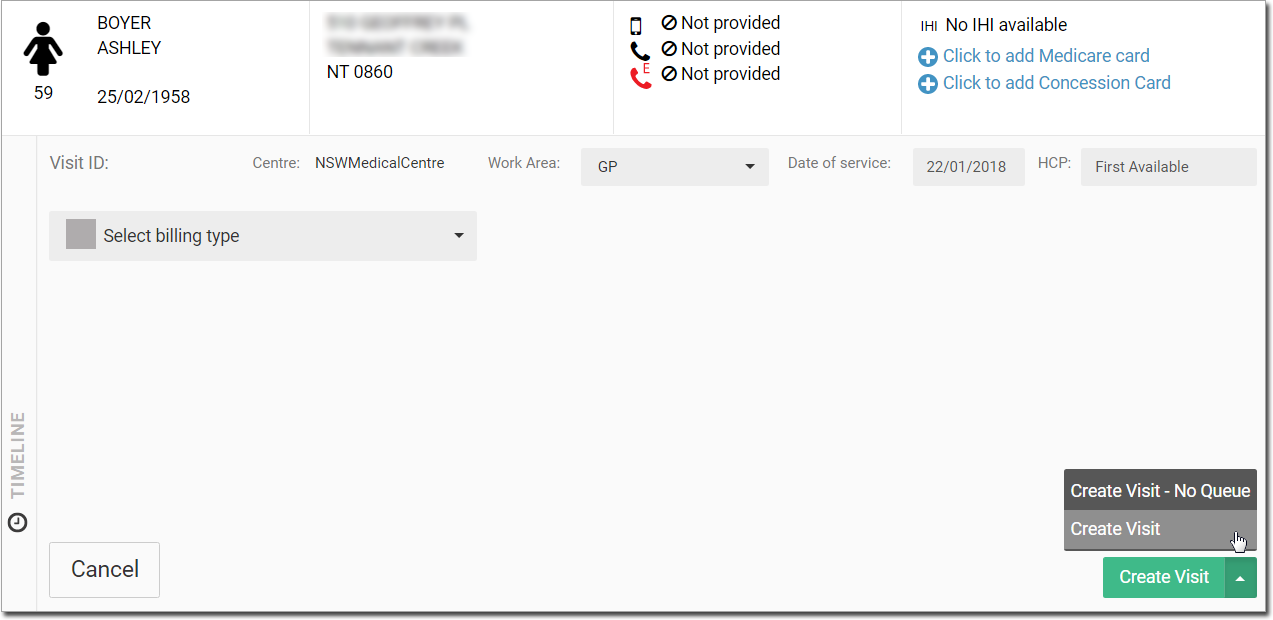
- Centre - defaults to the centre you're currently logged in to.
- Work Area - by default GP. If required, change the required work area from the Work area list. For example, Specialist.
- Date of Service - the current date. If the service was provided on a different day, select a previous date.
- HCP - either the name of the clinician selected when the patient's appointment was made, or First Available. In the latter case, specify a clinician by entering their name in the field.
- Billing type - one of:
- Medicare
- DVA
- Private
- Pre Employment
- Workers Compensation
Tip:DVA and Medicare options are only enabled if these card details have been entered for the patient.  Caution - notifies the administration
staff and practitioners about COVID-19 precautions.
Caution - notifies the administration
staff and practitioners about COVID-19 precautions.
Results
If you selected Create visit, a new visit is recorded with a new Visit ID and the patient is added to the Patient Queue.
If you selected Create visit - No queue, a new
Visit ID is created for the patient in the ![]() Visit panel.
Visit panel.
You would use this method if you are billing the patient for services delivered that
day (the most common method for recording a visit). A visit voucher is printed and
given to the practitioner when it is the patient’s turn. After the visit has been
recorded, a list of the visit Service Items is added to the patient's timeline,
flagged with the ![]() Visit items. For more information about Patient
Timeline, see Patient Timeline.
Visit items. For more information about Patient
Timeline, see Patient Timeline.
What to do next
- To start a consult for the patient, click Start consult. For more information, see Consultations.
- To initiate a billing process, select a patient and click Visit in the floating navigation bar. For more
information, see Initiate Billing.